Technical
- Selecting your Hardwood Floor
- Wood Grading Information
- Installation Sheets
- Floor Maintenance
- Glossary
- The Environment
- Downloads
Important considerations when selecting your hardwood floor
Before you start! Before you decide which Xylo Hardwood floor to choose, you first need to ensure that your subfloor is ready to receive it.
Is your subfloor sufficiently flat?
We recommend that your floor not be more than 4mm high or low over a length of 2.0m. This can be easily estimated by using a 2.0m straight edge. Failure to follow this advice may result in your floor being “sprung” and this might impair its long-term performance.
Is your subfloor sufficiently dry?
If you are going to lay onto a concrete subfloor, a DPM or an underlay incorporating a DPM must always be used where the floor is to be floated. If you intend to adhere your hardwood flooring directly to a concrete subfloor, always ensure that the moisture content of your screed is within the recommended parameters. Xylo Flooring recommends that this type of installation only be carried out by a qualified installer.
Acclimatization Period?
Every installation requires a period of acclimatization as wood needs to adjust to its new environment. Engineered & multilayer flooring should be left on site in the room where it is intended to be installed for a minimum period of 48 hours prior to installation. All packages should be laid flat and left unopened.
3-Strip or 1-Strip (Plank)?
As its name suggests, 3-Strip plank is where there are three rows of timber strips across the width of each board. These individual pieces are known as lamellas and this type of board offers a variation of colour & grades within each plank. 1-Strip is the term used to describe a single plank. It is certainly much easier to obtain smaller pieces of timber such as are used in 3-strip products. Therefore, 1-strip floors tend to command a higher price point. All Xylo Flooring 1-strip products also feature bevelled edges.
The choice of a 3-strip or a 1-strip Xylo Floor is down to personal preference. Please note that our 1-strip products are available in a wide selection of widths and lengths. Bevels are chamfered edges and are only available on plank flooring. All our 1-strip products also feature either a 2 or 4-sided bevelled edge. When the 2 long edges are bevelled, this will emphasize the room length. If the bevels are on all 4 sides of the plank, this will shorten the look of the room, but make the width of the room appear larger.
Lacquered or Oiled?
As the saying goes “beauty is in the eye of the beholder”: once again, the chosen finish depends on one’s personal preference. UV Lacquered floors generally have a higher level of sheen than oiled floors, which tend to have a matt or satin finish. There is little difference in the purchase cost between a lacquered and an oiled floor. Therefore, it will most likely be the look of the flooring that determines the choice of the customer. This said, there are several other considerations that should be taken into account when making this decision.
Lacquered hardwood floors are pretty much non-maintenance. They need to be swept over with a soft broom from time to time and occasionally wiped over with a lightly moistened mop or damp cloth. They will, however, show scratch marks with usage, as would a lacquered tabletop. With a bad scratch, it is sometimes possible that a French polisher may be able to improve the appearance. However, local repairs generally achieve limited success. It is of course possible to completely sand and reseal a lacquered floor, although this would not normally be required until such times as the flooring has given several years of hard wear. Unless the flooring has been badly damaged during its lifetime, this process will more or less restore the flooring to “as new” condition. On the contrary, oiled floors are much more forgiving as far as scratching is concerned. Scratches tend to be less obvious and are also much easier to repair locally. A light sand, followed by the re-application of oil, will generally restore the appearance of the flooring without the need to re-finish the entire area. Amongst the range of accessories available from Xylo Flooring are the following: Osmo Repair kits consisting of 6 coloured wax fillers for minor repairs that can be mixed to best match the colour you require and applied using the hot melt applicator, which is also included. However, before purchasing an oiled product, maintenance needs to be taken into account.
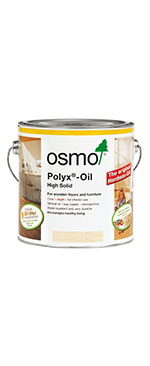
It is the saturation of the timber surface with oil that protects the flooring against spillage and soiling. As a precaution, Xylo Flooring recommends applying a coat of Osmo Polyx Hard wax Oil to pre-oiled floors at the time of the installation. Please note that this procedure may cause variation in colour. For regular cleaning, use Osmo Wash and Care cleaning and maintenance concentrate, which should also be used prior to any other treatment applied to the flooring, such as Osmo Liquid Wax cleaner, which cleans and regenerates the flooring and contributes to the lifespan of the product.
Further details on the full range of Osmo products including additional tips for the preparation and maintenance of oiled flooring can be found at www.osmouk.com.
PLEASE NOTE:
Since wood is a material fashioned by nature: Each board is unique and samples must be therefore regarded as a guide rather than an exact match for either colour or grain characteristics.
Hardwood floors will scratch and indent with use.
All timber species will change colour upon exposure to UV light.
Timber floors may expand and contract due to local changes in temperature and/or climate.
ALL FLOORS SHOULD BE APPROVED BY THE CLIENT BEFORE INSTALLATION.
Wood Grading Information
The most important thing is to be satisfied with the grade of timber you choose in order to obtain the look and feel you require. At Xylo Flooring, our products fall into one of the three groups listed below:
AB Grade Mixed (Select/Nature)
A Grade timber is taken from the core of the trunk and tends to be clean with a uniform grain structure. Moving outwards from the core of the trunk is B Grade timber that will become slightly more varied in colour with some pin knots. Expect variation in the natural sapwood colour, limited character marks, sound knots of less than 3mm, mineral streaks of less than 3mm x 100mm. No stains, checks or splits.
CD Grade Mixed (Rustic)
Moving towards the perimeter of the trunk is the CD Grade timber. This will become more rustic and varied in appearance. All colour variations and all characteristics of the species are allowed. A serviceable floor after knot holes, checks, splits and other imperfections are filled and finished.
Note: Where knots have been filled, it is sometimes impossible to closely match the colour to the wood, holes or voids.
DE Mixed Grade – (Country Grade)
Taken from the perimeter of the trunk is DE Grade Timber. This grade celebrates the more rustic features of Oak; Large colour variations, Filler, Knots, Cracks and Sapwood, are common and all can be present and permissible whilst creating a characterful and dramatic floor when laid.
Hardwood Installation
Vinyl Installation
> Dynamic Vinyl Fitting Instructions
Laminate Installation
Urban Herringbone Fitting Instructions
Under-Floor heating
Considerations when installing Xylo Flooring over underfloor heading
Xylo engineered hardwood flooring is generally deemed to be suitable for use with underfloor heating. However, special consideration should be given to ensuring a comfortable environment for the flooring.
Where the underfloor heating system incorporates a screed above the piping/electrical matting, the heating should be run on half load for at least 14 days after the subfloor has reached its ultimate hardness.
The heating system should be ready to function at least 2 weeks prior to the installation of the flooring and then switched off 2-3 days before the flooring is fitted.
The maximum moisture content of the screed should not exceed 2.0%MC at the time of the installation or, otherwise, less than 70%RH. Failure to allow sufficient drying of the screed may cause numerous issues, including discolouration of the surface/opaque appearance of the surface lacquer on lacquered products.
Extra care should also be given in order to ensure that the underfloor heating is installed in such a manner as to not create ‘hot spots’ on the surface that would be detrimental to the performance of the floor covering. Where an electrical matting system is installed, provision should be given for thermostatic probes at various points across the floor area in order to avoid localized overheating, which can cause serious damage to the flooring.
Please note that the maximum recommended temperature for underfloor heating in conjunction with Xylo Flooring products is 25 degrees centigrade (this allows for more nervous species).
The heating should not be operated within 48 hours of installation of the flooring.
An excessively dry atmosphere should be avoided as this may create stress within the structure of the boards. Ideally, the Relative Humidity should be maintained within the range of 45% to 65% RH. This can be easily monitored with the use of an inexpensive hygrometer gauge.
Relative Humidity is a measurement of the degree to which air has the ability to hold water at a given temperature. Therefore, the warm air to be found in the summer months may typically present a moisture content of 70% RH.
Damage to the construction of boards when used in conjunction with underfloor heating is most commonly caused during the winter months, when the relative humidity of the air outside is low, typically 30% RH. Static shocks in the home or workplace are a common indication that the RH is too low.
In the interests of maintaining a comfortable environment for flooring throughout the winter months, consideration should be given to the provision of a humidification unit. Otherwise, pot plants will assist in maintaining a reasonable level of humidity. With regard to the operation of the underfloor heating system, a rapid increase or decrease in the temperature of the underfloor heating will cause discomfort to the flooring. Consequently, the heating should not be turned on suddenly or the temperature of the floor raised or lowered quickly. The temperature of the system should be raised/lowered slowly. Recommended: 1 degree centigrade per day.
Xylo Flooring recommends that instead of waiting for a marked drop in temperature in the winter months prior to activating the heating, ideally, the system should be set low early on, then brought up to a comfortable level and run throughout the winter months at a constant temperature. This will enable the flooring to remain stable and, therefore, avoid dimensional changes that may cause the floor to shrink, crack or delaminate. Maximum comfort for the occupants of the property will usually be achieved somewhere between 16 and 21 degrees centigrade. This is also a comfortable range for your Xylo floor. There are different schools of thought regarding the best method for the installation of engineered hardwood floors over underfloor heating.
On the one hand, it can be argued that over larger areas, adhesion of the flooring to the subfloor with a flexible adhesive may help restrict the potential movement of the flooring. As far as solid timbers are concerned, there is also the question of whether or not to glue the header joints. Arguably, if there is cumulative expansion, this may be less noticeable if there is provision for the header joints to move apart than if they are glued together, as would be standard practice on an unheated floor.
Directly Adhered Floors
For those who are considering an installation where the hardwood flooring is directly adhered to the subfloor, please bear in mind that should the flooring need to be uplifted, the potential for the underfloor heating system to become damaged or destroyed in the process is considerable. Furthermore, where the pipe system is immediately below the underside of the boards, there is also greater potential for damage to the pipe work in the event of a board replacement.
Floating Floors
Floating Floors When the flooring is installed as a floating floor, an underlay should be used offering a low resistance to heat conduction, allowing maximum efficiency of the heating system. Provision should also be given to a minimum 0.2mm PE-film to act as a vapour barrier. This will often be incorporated within the construction of the underlay. The joints of this film should overlap by at least 20cm.
Gluing of the tongue & groove on T&G products must be carried out using a high quality PVA D3 adhesive.
Failure to allow due consideration to the information above may result in excessive gapping, splits appearing on the wear layer of the flooring or delamination within the construction of the boards. Due to our inability to control either the local environment in which the flooring is installed or the way in which the underfloor heating system operates, Xylo Flooring cannot accept any claims in this regard.
**Furthermore, due to the constant innovation within the underfloor heating industry and the numerous systems on offer, we would advise that specific recommendations concerning all installations of hardwood flooring be sought from the respective supplier of the underfloor heating system in question.**
Maintenance Oiled/Lacquered flooring
How often the flooring needs maintaining will depend on the environment in which the product is laid. Logically, an oiled floor laid in the hallway of a country cottage, where one steps immediately from the outdoors onto the flooring, will require more maintenance than an oiled floor laid to the lounge of a penthouse apartment in the West End of London. During the winter months, the proprietor of the cottage would also do well to consider some further protection for the flooring. For example, by providing for an entrance mat just inside the doorway of their home.
In conclusion, the use of common sense is your best aid in maintaining the long-lasting good looks of your oiled floor. At Xylo Flooring we take great pride in manufacturing our products to the highest standards, using the finest materials. Given reasonable care, Xylo Hardwood floors will give many years of hard wear, and we hope they will contribute to the creation of a tranquil backdrop to both traditional and contemporary interiors alike.
AB Timber Grade – The cleanest level of finished wood, for those who like a clean look to their floors; with limited character marks, sound knots of less than 3mm and mineral streaks of less than 3mm x 100mm. No stains, checks or splits.
Click – Valinge ® 2G, 5GC and UNICLIC are Patented Worldwide Installation Systems that just require pushing and clicking into place, no gluing is required.
Country Timber Grade – This uses more of Rustic wood, including ‘DE’ Grade Wood.
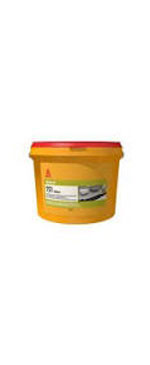
Directly adhered floors – Your fitter will be able to advise on laying your floor successfully and correctly. When gluing directly to your subfloor, we would recommend a high-quality adhesive such as Sikabond ® AT-80 which is solvent free. It is also an elastic adhesive which is suitable for Underfloor Heating. Please note our 20mm Multi-Layer woods can be nailed directly to the Subfloor or Joists.
Engineered Board – A 3 ply or Multi-Layer structure floor that is ideal for use with Underfloor Heating, making this a stable and strong floor for any location.
Flexible Plank Technology – Each Board in our Italian Collection-Contract only, has the XyloFlex® unique finger jointed base that balances the board and gives it totally flexibility, this results in no cupping or warping.
Floating Floors – When the flooring is required to float i.e. it is not directly adhered to the Underlay or Sub Floor, it will either be laid by a Click System, when the Boards are pushed and clicked into place or a Traditional T&G System where the joints are glued.
Life Time Warranty – Xylo’s ® Warranty on all our flooring.
Multi-Layer Board – Constructed of Multiple layers of plywood making this a very strong and stable board. Multi-Layer Boards can be floated, glued or nailed directly onto the subfloor or with a 20mm option, nailed directly into joists. Generally, this type of flooring is not suitable for use for Underfloor Heating.
Rustic Timber Grade – A more varied level of finished characteristic wood, all colour variations are allowed and all the characteristics of the species are allowed. A serviceable floor after knot holes, checks, splits and imperfections are filled and finished.
Subfloor – It is very important to ensure the subfloor is perfectly flat before laying your Xylo Floor. Your professional Fitter will be able to determine and advise on this for you. If you have a screed or concrete floor you will require a DPM (Damp proof membrane) to protect your floor.
T&G – Tongue and Groove Installation System. A Traditional Installation System that pushed together and glued at the joints. We recommend a high quality PVA D3 Adhesive-Sika® 502, this is a silicone and solvent free elastic adhesive.
Terms of Finishing – Brushed, Steamed, Distressed, Handscraped.
Underfloor heating – Many of our floors are suitable for Underfloor Heating, if you are unsure check with your Underfloor Heating Supplier on suitability.
Xylo Flooring and its commitment to the environment
Due to the considerable volumes of lumber consumed during the manufacture of our products, we carry a huge responsibility in ensuring the sustainability of our raw materials. Xylo Flooring is proud to hold the FSC® Certification, which in turn allows us to offer Forest Stewardship Council® certified products for specified projects.
By working closely with our factories, we ensure that all our products are produced using sustainable resources. Where required, FSC® Certified products can be provided for larger projects if so specified. For further information, please refer to our sales office.
Maintenance
Installation
- Considerations when installing Xylo Flooring over under floor heating
- XYLO Click engineered wood flooring installation instructions
- T&G engineered wood flooring installation instructions
- Multilayer engineered wood flooring installation instructions
- Sanding Procedures for Hardwood Flooring
- Dynamic Urban Laminates – Installation instructions

